I am lost in fabric.
Mom was here on the weekend and we played with fabric. We also bought fabric, but only a little bit. I sewed some stuff for her, but I’m not supposed to tell because it was for a class and she sucks at binding. She gave me some fabric, and it wasn’t even part of my (belated) birthday present. Aw, she loves me. 🙂
And today I got up from the computer, went to start supper, then sewed. And sewed. I sewed for two hours because I was inspired to make a tote bag from a charm pack and some scraps. (Also Ron figured out why the plugs out there weren’t working.) Mom brought me some scraps from her local shop that the lady there was throwing out. I KNOW! I can’t bear to just toss out fabric – the amount of one print and a bit was enough to completely line my tote bag. All it took was some creative piecing.
I am also jazzed that my library now emails me to tell me when my books are due. Library trip tomorrow, who’s with me? And to tie it in, I’ve made a couple of totes for the library to sell so they can raise money. I’m nice like that.
Anyone need a tote? 😀 “Seams” like I’m on a roll. 😉
Charm pack tote:
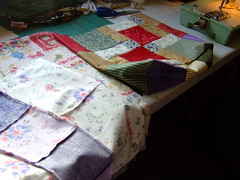
Using moda’s Natural Garden charm pack, I made two disappearing nine patch blocks from this tutorial.
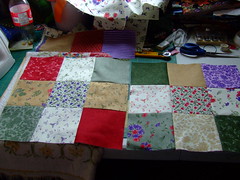
I think the charm pack had 32 or 40 5″ squares, all different. I arranged the patches in a pleasing manner first, saving the ones I didn’t like so much for the sides of my box tote. I had 4 blocks left over, which I eventually used on the inside.
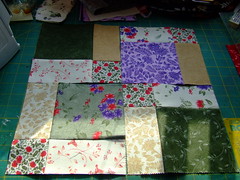
After I did the block, I sewed nine patches in a very long row for the sides and bottom of the bag. I had to carefully piece one long edge around three edges of one block, then the other edge to the other block. Then my outer bag was done. Since I need to work on my accuracy, I was extra careful to iron, pin and align seams. Iron every seam before it crosses another seam – this is the difference between something looking handmade and it looking hand crafted.
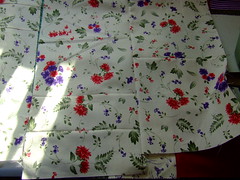
I pieced all of the scraps I had from one coordinating print all together, continually holding them up to the blocks as I went to best take advantage and minimize waste.
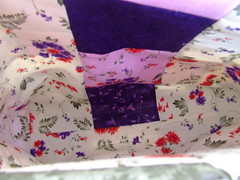
When I saw that I needed a bit more, as luck would have it 4 of the leftover charms fit right in. I put that strip right up the middle of one inside panel. Since the inside is pieced differently, I boxed the bottom by pinching the corners and sewing a triangle shape.
I still have to make the handles using a scrap piece and some plain fabric from my stash. All in all, given half of the fabric was free, and mom got a discount on the charm pack, this is my $7 CAN tote. 😉
(Not counting the two hours to sew it together, and the other hour to arrange the fabric and do the math.)


