I guess there’s this process pledge running around the quilt bloggers.
While not exactly pledging, per se, it does at least give me a jumping off point for stuff to blog about. I mean, surely at least my mom will read this post… all the way to the end….
Some quilts take a long time to make. That might seem to you one of the biggest understatements of the year, (“It’s like saying Hitler was a tad disagreeable,”) but there you go. Some quilts take longer than usual because, as my mom says, you have to live with it for a while, before you actually live with it all finished.
(and when all else fails, give it away! Oh how generous, we made this just for you, I SWEAR we did…)
So once upon a time we wandered in a quilt shop and I fell in love with some fabric. *shrug* It happens. It happens with alarming frequency, actually. I bought a jelly roll of it. I convinced my mom to buy me a charm pack of it.

It very quickly mostly sold out before I figured out what to do with it. Also: I am cheap. I don’t want to by yards of something unless I really really (really) need / want it. And I realized afterwards when my local quilt shop owner does her own packs, they contain half the quantities. So I have a smaller stash. And I am stuck.
But still we get back to the process – I have these limitations, almost like a challenge or a trick algebra question on the final exam. You have X amount of 4″ squares and Y amount of 2.5″ strips, 44″ long. Your challenge: make a usable quilt that is both visually appealing and leaves as little leftovers as possible.
I get the fabric in April. By July, I figure out the blocks.

All the rest of the summer, I try different variations with the remaining bits of the strips used on the blocks set up on a felt design wall in the craft room. I’ve only done a few blocks to start, while I make up my mind. Then we discover the craft room wall is leaking, mildew is building up, and I pack up all kinds of things. That, in fact, was summer last year, not this one. It sits in a pile until now, shuffled off. Sometimes you need to do that – stuff it in a pile where you can’t see it. Hide it so your subconscious can turn the puzzle around.
I have new fabric coming, and the piles on one end of the production line are getting bigger, and things are not progressing down the queue. I resolved about a month ago to actually sew, instead of the real fun part – cutting stuff out.
Eventually this pile came to the top, neglected and bawling, and I pressed and I sewed and I plowed through the really quite small pile, whatever took me so long, now really Andrea, sheesh. I lay things out on the floor, when reasonably cleared, sometimes just out of trafficway but where others can see it and make suggestions.

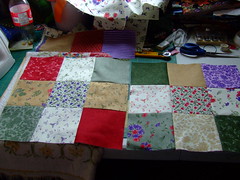
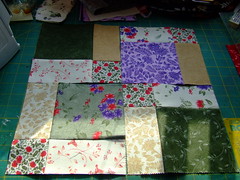
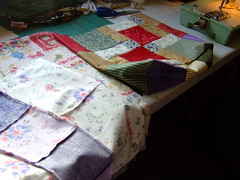
Here I am last weekend, testing out fit and the layout in general. Now that I’ve made up my mind on assembly and working on this quilt in particular, I can see that some squares need to be reorganized in terms of color and value, but while doing this, my main point was to figure out where to sew strips in relation to the blocks themselves. I just tossed them down, willy-nilly, spinning them quickly with one hand to line up the edges next to each other. Before I sew the rows together, I’ll get Ron to help make sure color and value are distributed evenly all over the quilt. No two prints touching, like cartographers of fabric.
Four rows of five blocks, and using strips means making sure I have enough for a border all the way around. There are two rows of strips between the rows of blocks, but not through the middle itself. The strips as rows are added deliberately to make the quilt more square, instead of along the other way, where there are more blocks. I overlapped them slightly to account for seams. The upper left shows one remaining strip, and if I guesstimated this correctly, I will have probably a 6″ strip left over.
Not accounting for backing and binding, that is. 😉
Next steps:
– sew strips together in groups of three
– test layout of blocks & strips
– figure out block layout and sew rows of blocks together
– test layout again
– sew rows of blocks and strips together
– test layout with strips as borders
– sew borders on
And then, THEN it can sit in the “finished tops” pile, which, although growing at a substantially slower rate than the “to cut” pile, is at long last growing. I can decide on the binding (leaning towards a dark color here) and backing later, either finding something in my stash or breaking down and actually buying yardage from the same line if I can find some. This one, I think, would be worth it. And lets face it – my mom doesn’t have any yardage of this line in her stash. No ideas yet on the actual design of the stitching when I do get around to quilting the layers together. I think I’d like to do swirly more so than following lines, though my free motion skills are laughable right now.
It is a small-ish quilt though, literally only covering your lap, or a small side table or a section of floor for a very special indoor picnic with your best play teacups, the antique ones in the cupboard that belonged to your auntie.


