Oversize log cabin

Posted on 4 Comments

I made this oversize single log cabin block quilt way back in May of 2012.

boy log cabin

I just pulled pieces of kid prints from my stash and went to town, building up a block until it was a decent size. I did very little cutting of fabric.

This summer, I finally got around to quilting it. I backed it in a cheery dinosaur print and did an allover stipple. It was fast. Then I bound it in this great lime green solid.

You can buy this quilt in my Etsy shop too.

Appliqued baby name quilt

Posted on Leave a comment

When I heard I was going to be a grandmother for the third time in four years, well of course my first thought was what quilt I was going to make.

Okay, maybe that was my second thought.

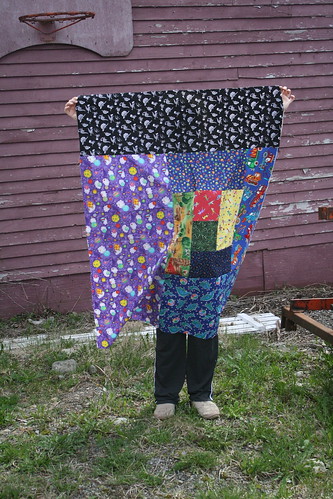
After I made this baby quilt, I figured you would love to have this free baby quilt pattern. It was super fast and easy to make.

I had a yard or two of a lovely fabric with dancing bunnies in pretty pastel Easter gowns. It was perfect after we knew we would be expecting another girl. I pulled some somewhat matching tiny prints for the letters for the front of the quilt.

baby quilt letter placement

For the front piece of the baby quilt, I used about a yard of a tone on tone off-white print. It’s about 30-36″ by the 42″ width of the fabric. Then I cut the letters freehand from the fat quarters I had chosen to complement the print on the back.

The letters could also be done with a large thick font. My size was about as big as a regular sheet of printer paper, so you could draw them out on paper first and then cut them from the fabric.

It would be smarter as well, to fuse some fusible web to the back of the fabric before cutting out the letters. I didn’t, and it made my work a bit harder.

Also if you have a name with a lot more letters, you will need to make the letters smaller so they all fit. If you’re not sure, do a test with paper letters first.

baby quilt testing fabric placement


You can see here how I didn’t like the original fabric for the letter A and swapped it for a yellow instead.

fusing letters in place on baby quilt


Here’s the quilt on my design board with the letters pinned in place to test placement. You can go vertically in a straight line – mark a guide line if you like – or go all funky and wonky.

Fuse the letters in place. This is mostly to hold them down before appliquéing.  I used a blanket stitch that came on my Bernina Aurora 440 Quilter’s Edition. A zig zag will also work perfectly fine.

back of baby quilt


Baste the top and bottom together with your favourite batting and quilt away! I used an allover paisley design, and went around the letters entirely, adjusting the design to fit. This is great practise for any allover design you want to try. And a baby quilt is a great size to practise on.

I also used a pretty Sulky variegated thread in pink / green / yellow. It matched perfectly.

easy fast baby quilt


You can see here how puffy the letters look. The only thing I would do different now is to outline quilt the letters.

IMG_0624


I bound the quilt in a jade green dot that was actually from a line of Christmas fabric. It works though!

I always pre-wash my quilt, so after coming out of the washer and dryer, the cotton fabrics and cotton batting crinkled up so nicely. It looks like a family heirloom already.

This is a super easy and fast quilt to through together. Just make sure the parents don’t change the name before birth, if you are making one ahead of time. 😉

Meaghan’s gray and purple quilt

Posted on Leave a comment

YAY! I finally finished Meaghan’s quilt this week. Her birthday was Nov 1st. Remember, I also made a quilt for her brother and his birthday was the day before. He got his quilt on time tho.

I used the same pattern for both quilts, except for Meaghan I sized the blocks smaller to 5″ and made the sashing smaller as well. This brought it down to a twin size. She picked purple and grey as her colors.

It sewed up fast enough but both Meg & I hummed and hawed over how to quilt it. Finally we decided to go for diamonds in the sashing areas. When I finished that part, she picked a curved leafy design for the borders. That was not something I want to quilt again any time soon. They are small and detailed.
After another long period of indecision, I went and quilted loop squares in the squares .Those were pretty fun! It worked up fast too, as I just went in a straight line down the side of each square to get to the next one, and went around the quilt in a big circle towards the side. This made nice lines on the back as well.

I bound it in a grey on grey floral she picked out from the Thimbleberries line. Just straight cut, 3″ wide, folder over and sewn down on the front.

She’s happy, so any mistakes are noticed only by me. It crinkled up real nice after washing as well.

There’s a shot in here of the border before and after washing.The denser quilting on the border definitely crinkled up really nice.

Meaghan’s quilt

Posted on Leave a comment

My daughter Meaghan (kid #3) hunted through my stash and gathered up all the green and purple she coudl find. Solids, prints, didn’t matter, as long as it was green or purple. She them arranged them to her liking and sewed them all together.

We did have some fabric cut into strips, which she chose for the borders – a light print for a skinny inner border (the fabric was cut that thin already) and a dark purple for the outer border.

For the back we used a purple sheet, trimmed and folded over to the front for binding. I quilted it in the ditch, nothing fancy.